Make Your Own
If you’ve got to this page because you bought one of our CHSW Make-your-own-cider kits on Apple Day then you are very welcome, and you’ll find more detailed information here. If you haven’t started making your cider yet, then it may be desperation that has brought you here. If so, don’t worry. If, after reading this you are still in the dark, email the address on your leaflet and we’ll sort you.
If you’ve got to this page because some random search engine brought you here when you searched for help making cider – you are also welcome.
In either case, I will assume that you are in possession of some apple juice in a demijohn, and you have in your hand a sachet of yeast and an airlock. If you don’t have those things, I have another page that you should start at.

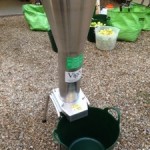 Assuming still you have the CHSW Make-your-own-cider Apple Day Kit, the apples have been crushed in the scratter and then pressed in one of our two presses, Burt and Ernie. These each take 40Kg of scratted apples and produce 20-30 litres of juice from that. The presses are capable of producing 12 tonnes of pressure when fully wound. This is all turned by hand. The apples that we use when making cider are either desert apples such as Cox’s or Russetts, or cider apples such
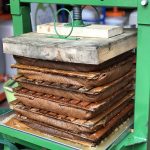 as Dabinett or Redstreak. We avoid cooking apples due to their high acid, low sugar, and general lack of body. They do make a fine apple crumble though. The apples that come to Apple Day do include a larger quantity of cooking apples than we would usually use.
At this point, you’ll notice that this is lifted word for word from the leaflet. Not in the least – they were merely developed together. However they deviate here.
The demijohn is not full. It’s important to leave some space at the top, as yeast requires oxygen for the first stage of its fermentation. This is called Aerobic Fermentation. It is very vigorous, and lasts only a short while. If you have decided (choice time shortly) to go with natural yeast (really, don’t) then it will be less vigorous, and will last a lot longer. If you have gone with the commercial yeast then it will be very vigorous, will probably take more space than you have left, and you’ll need to clean and refill the airlock – think ignoring a pan of boiling milk.

Choice time. There are two schools of thought, and both are wrong. You just need to decide which is the least wrong. One says you should let the natural yeast that is in the apple juice do the fermentation. One says you should kill the natural yeasts and introduce a commercial yeast designed to make a higher alcoholic drink.
The natural yeast will give you a subtle flavour of its own. It will ferment slowly, which is generally regarded as a good thing (non commercially at least). Because it’s natural, it’s also less tolerant to alcohol than commercial yeast, and so is likely to be killed off before the cider goes completely dry.
Unless it doesn’t. And this is the issue with natural yeast. It might not be there at all. It might be there, but be weaker than other fungus that’s in the juice. You may end up simply with mouldy apple juice – which would be a shame, although quite unlikely.
You also may not know the provenance of the juice. Apples may not have been cleaned nicely. Ensuring that the juice is nicely sterile in this situation will also kill the natural yeasts.
So, dealing with the last two situations involves killing anything bad (but also good) in the juice, and introducing a commercial cider yeast. And here lies the problem with that. We know that we’ll get a much more consistent, safe result if we kill everything in the juice and use a commercial yeast, but we’ll also lose the subtleties that the natural yeast introduces.
A halfway house could be to not kill the natural yeast, but to introduce the commercial yeast anyway. I won’t suggest not doing this, but for the purpose of Apple Day cider, I’d suggest we don’t know the provenance, and so it’s a Good Idea to sterilise.
So, the wild yeasts that are in it should be killed. This is done with sulphites (campden tablets). Crush one campden tablet and drop it into the juice. At Apple Day we will do this for you, if that’s what you want. If you are just reading along, you’ll 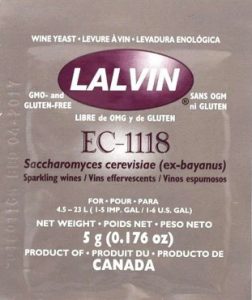 need to get your own.
After 24 hours, the sachet of yeast can be added. Take some of the apple juice and pour it into a clean cup. Add a small quantity of warm water so you have a tepid solution that feels very slightly warm if you put your finger in it. Add the yeast to this, stir and cover with kitchen roll for 15 minutes. It will go foamy a smell like bread. Pour it into the demijohn and gently shake to mix. Put on the lid, half fill the airlock with water, place the airlock into the demijohn lid, and place the airlock lid on the airlock. After the initial vigorous aerobic fermentation you may have cider in your airlock. If so, remove it, refill with water and replace it.

When the aerobic fermentation has completed it will settle down to an anaerobic fermentation. This does not require (and should not get) oxygen. The ’empty’ space on top of the juice/cider is in fact full of carbon dioxide. You may notice small bubbles rising in the juice/cider. You will see bubbles rising through the airlock. These are carbon dioxide bubbles. For every bubble you see, some sugar was broken down to carbon dioxide and alcohol, That is what the yeast does.
Eventually, the bubbles will stop and the cider will start to clear. This is because the yeast has turned all the sugar into alcohol. If you added more sugar and you had used a commercial yeast, it would start again. When the cider is clear you’ll notice a sediment at the bottom. This is the dead yeast and apple pulp that was in the juice. Both are fine in small quantities but you need to get the cider off the sediment in order to be able to pour it into a glass and drink it. This is called ‘Racking’.
You should syphon it but you can pour it very gently into a very clean jug. Syphoning is best, but in both cases you will need to leave some at the bottom of the demijohn to avoid it being too cloudy. Wash the demijohn and pour the cider back into it. Top up any space at the top with water so there is m air at all on top.
The whole racking thing is not complex, but if you’re struggling drop us an email and we’ll help you with it.
After racking, keep the airlock on your cider to stop air or flies getting in. Both will turn it to vinegar – flies will do this much quicker than air. Unfortunately whilst apple juice wants more than anything to be cider, cider wants more than anything to be vinegar.
The cider that you’ve made will be between 5% and 6% ABV. It will be dry, but you can sweeten it with some sugar when you serve it. If you try to sweeten it and keep it in the demijohn, it will start fermenting again and just get stronger.
Bonus points – if you fancy trying naturally sparkling cider, you will need 5×1 litre bottles capable of holding fizzy drinks, and their caps. You can buy these online or you can use bottles that you bought sparkling water in. Simply put between 1 and 2 teaspoons of caster sugar in the bottom of the bottle, and fill with your cider. Screw the lids on tightly and put away for a couple of months. The cider will start to ferment again, but as there’s no way for the carbon dioxide to escape, it will remain dissolved in the cider, and will build pressure inside the bottle. Chill before opening carefully.


